|
|
|
|
|
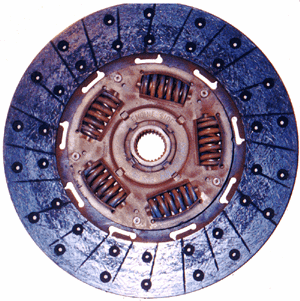
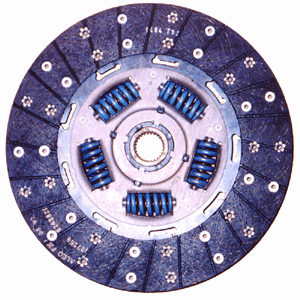
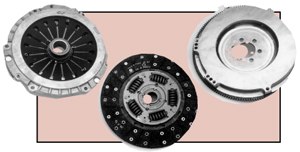
Here's the stock clutch disk as it came out of the car. As you can see, it has slipped quite a bit over the last 6 months. The outer edge is shiny, where the slippage occured. |
The SLP clutch disk looks very similar, if not identical to the stock clutch disk. Although I'm making a fair amount more power than stock, even the stock clutch did fine until the 48,000 miles took it's toll. |
|
|
|
|
|
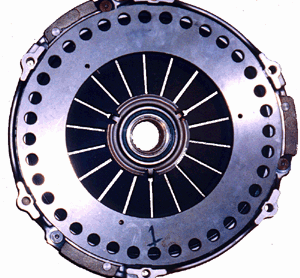
Here's the backside of the stock pressure plate. As you can see, it's got some heat marks in it, from spinning the clutch. Not too bad though for 48,000 miles. |
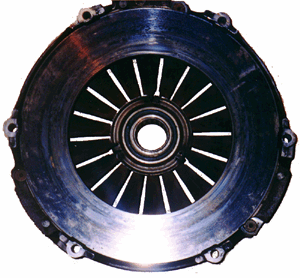
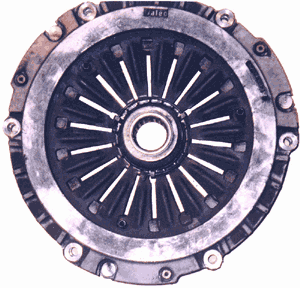
Here's the new SLP pressure plate. Definitely a heavier design. Rumor is that it's the LT4 pressure plate, as it's a Valeo design, and Valeo only did two that fit the LT1. The drilled holes are for lightening and heat dissapation. |
|
|
|
|
|
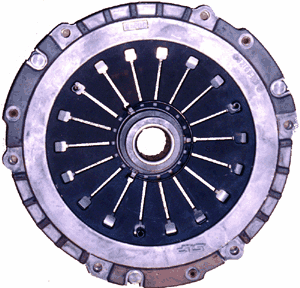
Here's the trans side of the stock pressure plate. It's hard to see, but the stock fingers are fairly thin, necessitating the ridges in the middle of them. |
The SLP pressure plates' fingers were thicker, and didn't require the ridges. Here you can also see the ring that holds the throwout bearing in place. As discussed later, this came out during normal operation! |
|
|
|
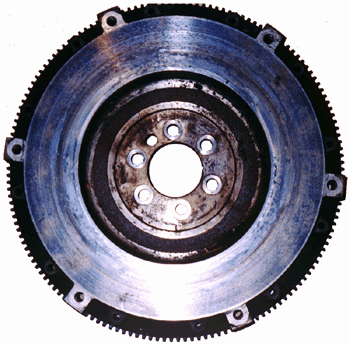
Here's the stock flywheel. You can clearly see the heat marks on it. This behemoth weighed in at a whopping 20.36 lbs. |
|
|
|
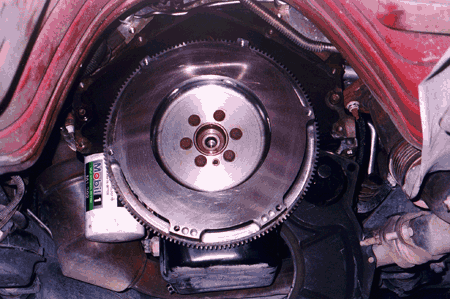
Here's the new SLP flywheel installed on the back of the motor. Getting that pilot bushing out is no fun, but the wet toilet paper trick does work. Simply stuff some wet toilet paper in the middle, then tap firmly with a 3/8" extension. Continue to add more and more paper until the bushing finally falls out. We also installed a new rear mail seal while being this far into the motor. It's easy to do with the flywheel off, plus I have heard the horror stories of others replacing the clutch, then having to do the rear main seal only weeks or months later. Everything that to be removed again to get to it, so it's cheap insurance at this point. The SLP lightweight billet steel flywheel did hold up to it's end of the bargain. Weighing in at a mere 12.56 lbs., it was 39% lighter than the stock one. I didn't weigh the pressure plates, but I'd also assume that the SLP drilled pressure plate is lighter than the stock one too. |
|
|
|
With the new pressure plate in place, we were now ready to put the bellhousing back on and reinstall the transmission. As someone else once said, this setup is so nice looking, you hate to hide it under the car! |
After installing the clutch, everything went smoothly until the drive home. About 2/3 of the way home, I heard a terrible rattling. It sort of sounded like the dust shield on the front side of the bellhousing was dragging on the ground, but when I came to a stop, it was still rattling. I drove to a nearby friends house and got the car jacked up. Upon removing the dust shield, I found that the small clip that held the throwout bearing in place had come loose and gotten around to the front side of the flywheel. Since the SLP flywheel is cutout around the ring gear, this is possible with it, but not with a stock flywheel.
I removed the piece and drove home. I spoke with several people the next day regarding the actual job of this part, and it turns out it's just there to help with installation (holds the TOB in place while you get the trans back in). It was not a critical part, and the clutch has worked great since.
I've bumped the nitrous up some, and it is still doing a great job. I think that this setup, at $695, is definitely one of the best out there. You can get it directly from SLP at SLP Online Catalog. Search for driveline components. If you do order, ask for Kevin and tell him that you saw this at WS6.COM!
![]()